Tag Archives: colorful

More Bang for a Buck

Standard

I know that many crafters are already familiar with the great “stuff” available at the dollar store, but sometimes I get excited about my finds and just have to share. A couple of days ago I was treading water between the end of school and the beginning of a meeting, so I stopped at a local Dollar Tree to pick up a snack. Of course, I couldn’t just hop in and out without perusing all the goodies – many of which just seemed to kamikaze off the shelves into my basket (go figure)!

I (obviously) started my excursion on the craft aisle where I found several kinds of glitter paint and glue. I was surprised to see the glitter hot glue sticks since those are not frequently available outside of craft stores. I also did not expect to see the large pieces of foam core / display board. These make a nice, sturdy foundation for lots of crafty ideas. Of course, the itty bitty clothes pins, colored buttons, and butterfly jewels are just too cute.

The office supply aisle yielded some pretty snazzy stickers and a couple of just fun items. I have to call your attention to the paper bracelets, though. These were hanging with the teacher/bulletin board items. I’m sure they’re meant to be reminders sent home to parents of small children. (Write the reminder and tape it around the child’s wrist so s/he doesn’t forget to tell Mom and Dad.) Still, I thought they could be pretty useful for remembering to bring something home or pick up something at the store. (Write your reminder and tape it around the handle of your purse or the steering wheel of your car.) Of course, many people do this sort of thing with sticky notes, but they always seem to fall off of where ever I place them.

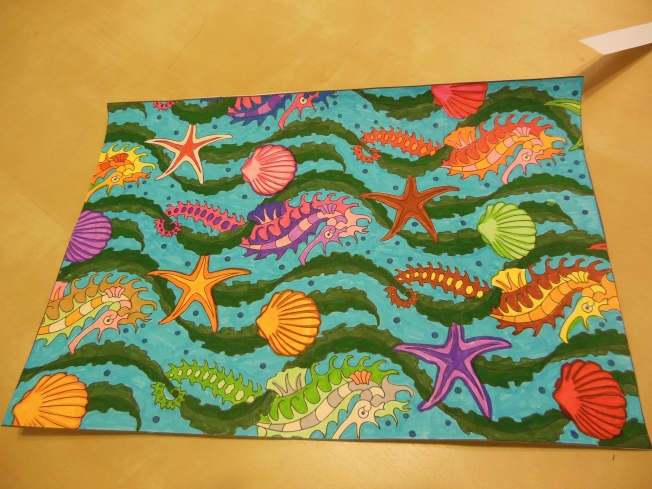
Next stop was the toy aisle. I found a couple of nifty things to color for use in my classroom. (I thought the glittery poster board background on the balloon picture was really fun.) The other item is a colorable notebook cover and who doesn’t need more fun on their English notes? In addition, I found a bunch of cute puzzles. (Now, you have to understand that Lochinvar is a gifted puzzle person. He just glances at the pieces and knows where they go! This is a cool super power, but extremely frustrating to the rest of us mere mortals.) I envision that these could become the background for some nifty artwork. For example, complete the puzzle and glue it together. Then use a wash to tone down the colors and paint something related on top. How fun would that be?

Over on the wrapping paper aisle I found a series of “Diva” gift bags with the cutest cruel shoes. I envision cutting out the shoes and the words to use in a collage. Besides, who doesn’t love shoes? Of course, I have to love the pictures instead of the real thing because my feet would never tolerate such heels. I’d probably break an ankle just trying them on!

Over on the “home” aisle – where you find picture frames, small tools, etc. – I located these large-scale vinyl wall stickers. While I already have some of the floral and butterfly motifs, the over-sized elephant, birds, and balloon were newer designs. They actually come in two pieces which get matched up on the wall; although it would be cool to attach the stickers to an inexpensive canvas to give them a more artsy feel. It would also be fun to color the elephant before putting him up somewhere.

Overall, any time spent getting inspiration is a good time, but when those inspiration pieces are only a dollar, it’s even better! I hope you find colorful inspiration in your world.


A Fresh Start

Standard

As a January baby it has always made sense to me that a new year means a fresh start. Once we reach the day after Christmas, my wheels start turning and I contemplate what I need to begin anew. This year’s answer is my art. I want to move from the realm of part-time crafter to real-time artist. That means a new commitment to learn, grow, and practice art on a daily basis. Shockingly, this requires actual scheduling on my calendar. To that end, I purchased a goal-setting planner and spent several hours evaluating what I really want out of my time on earth and how to get it. (To be fair, I have most of it already – my sweet Lochinvar, my talented kiddo, supportive family members, and space to dream.) With these intangibles under my belt, it’s time to pursue some concrete goals, and the best way I know to begin a journey is with a clean slate, so I spent three days (yup!) cleaning out and reorganizing my craft room into an art studio.

I started by taking EVERYTHING out and changing the organizational structure. Previously, I had items sorted by “topic.” For example, all flower-related pictures/cut outs were in a box. Other boxes held bugs and butterflies, cats, watches and keys, words, etc. There were boxes of ribbon, boxes of lace, boxes of buttons and jewels, boxes of broken costume jewelry. Everything had its place. Having lived with this system for a couple of Januaries, I thought it best. However, upon really contemplating how I create, I realized that I didn’t open most of the boxes on a regular basis. I had one or two motifs that I used over and over, and then I dug through the box looking for a specific color. I didn’t always remember that other motifs might have that color. (For example, when I’m looking for blue, I don’t automatically think “cat.”), and thus I began to feel stuck. So… everything had to be resorted by color (and everything I hadn’t touched in a year or two had to go to Goodwill).

This, my friends, was quite the task. I honestly did not realize how many pieces of paper I had in my space. (Let’s just say I might be a candidate for a t.v. show about craft hoarders.) I even broke down and cried once when I hit the point that my basement was a huge mess, I had spent hours working, and I was only halfway done. (You know that feeling? The one in the pit of your stomach when you know you’re screwed because it will take just as long to clean it all up and go back to the way it was as it will to move forward and finish the job?) Ugh. However, I persevered, and I learned some things along the way.

First, I was inspired by many of the images that had been hidden away in boxes for a couple of years. All the ocean scenes, green leaves, seashells, cherubs, gilded edgings, and pictures of beautiful women made me want to stop in the middle to create something. Second, I realized I had been even more stuck than I thought. I had fallen into going to the “expected” image instead of the interesting one. Third, I found that some disarray made me happy. Now, usually I’m all about tidiness, but something in the profusion of color and motifs is inviting. A little (organized) chaos is good.

Take a look:

dscn2435This is the completely reorganized studio. (I realized after I had ripped a good bit of it apart that I should have taken a “before” shot. Sigh.) This configuration leaves some wall space to hang art and a project board.

dscn2436All of my “stuff” is resorted into baskets by color. This storage system from IKEA is inexpensive and ultra handy (I’ve had it in different parts of my house for several years). The color bins include white/beige, tan/brown, yellow/orange, purple, black, pink, red, blue, green, metallic, multicolored (for things that didn’t really fit anywhere else), and people. I left the “people” motif because that is the one element I always know I want. Other baskets have cardboard, original drawings, sketch books, etc.

dscn2437This is a close up of the side wall. All of the solid color paper and card stock of various sizes are sorted by color, too. They are stacked in open cubbies where they’re easy to see and grab as needed. The bottom shelf has books for cutting up. Some of them are quite old reference books with beautiful antiqued pages, while some are much more recent books with interesting pictures to use as clip art. Most of them were free from a library that was downsizing. The few I paid for came from thrift shops for only a couple of dollars. (Actually, I have a rule about not spending more than $2.00 on elements I plan to cut up and paste together.)

dscn2438

Now the back wall items for craft shows including canopy parts, display pieces, inventory, office supplies, etc. This shelving unit and its contents used to be in the main area of our basement, but swapped places with my computer desk to clearly separate the areas and create a more open feel.

Though the space looks a little spartan at first glance, the lack of clutter is soothing and the real treat is pulling a basket for ideas.

The pink basket looks pretty unassuming by itself, but once you start unpacking all kinds of goodies appear.

Previously, if I needed something pink I would have gone for flowers, but now I see there are so many other options: cats, dragon flies, butterflies, bunnies, shells, and even crosses. This arrangement encourages diverse thinking and is just more fun.

As 2017 gets underway, I hope you find yourself moving forward. It’s your world; color it!


Easy Desk Accessories

Standard
Easy Desk Accessories

I really love the idea of upcycling because I enjoy turning trash into treasure (to be trite) and making something useful for little or no money. Tonight’s project fits the bill on all accounts. I’m always looking for a way to store pencils, markers, scissors, erasers, and all sorts of other little doodads. I like having them easily accessible, but out of the way. So,  pretty cup-style holders make sense to organize my creative space.

I started with a couple of empty cans. One is a larger vegetable can, and the other is a cat food can. The bigger one is perfect for an assortment of markers, while the smaller is just the right size for paper clips, erasers, or pencil grips. I simply washed them out and removed the labels, which usually come off easily and provide a template for the decorations.

DSCN2336

Next, I grabbed a completed coloring page. (This one is from Creative Cats by Marjorie Sarnat.) I chose it because I think the cat surrounded by paint tubes and brushes is a good decorative touch for my drawing table. Since I wanted the cat’s face to be a focal point, I cut across the picture and pieced the strips together to make a new “label” for the larger can. I left my strip a little longer than the original to make sure I had plenty of overlap. (You can always cut some off, but it’s difficult to add it back on!)

Next, I repeated the process with another coloring page since there wasn’t enough left of the first one to cover the small can, too. (This page is from Flower Art and was drawn by Susan Bloomenstein.) I wanted the flowers to be right side up, so I (again) cut across the sheet and glued the two pieces together.

DSCN2340

The final step is to simply wrap the new labels around the can and glue them in place. I put some glue on the back of the paper in several places to help secure it, and then just glued down the overlapping edges. Voila! The cans are ready to serve as colorful organizers for my desk.

You could construct a whole set from coordinating coloring pages. Choose a theme that fits your style. A group of these along with some colored pens, etc. to fill the cans would make a nice teacher gift, too. (Trust me, teachers can never have too many containers!)

Remember, use what you have to make the world a little brighter! Happy coloring!


Summertime, and the Book Marks are Easy

Standard

With summer reading just around the corner, tonight I’m sharing one of my favorite quick and easy uses for coloring pages. Book marks make great gifts for teachers and librarians as well as nice add-ons to  gift cards from Amazon, Barnes and Noble, etc. Summer trips to the library bring back fond memories from my childhood. There’s something comforting about the amiable silence, the smell of the paper, and the feel of a good book in my hands. (Ok … maybe it’s an English teacher thing, but what can I say?) In this age of digital reading, my family still sojourns to the used book store and sorts though other people’s left overs at the local thrift shops, so we necessarily have a supply of book marks on hand, and coloring pages or small pieces of artwork are the perfect way to personalize these items. Here’s a photo of my current assortment made from purchased coloring books and my own drawings. (I usually have a large stash because I give them away as freebies at craft shows.) DSCN2327[1]

These are super simple to make! Just choose a page or a piece of artwork that you’ve completed and cut it into strips. I like 1.5 to 2 inches, but any size is fine. Once the pages are cut apart, I use a broad-tip black Sharpie to add a little frame. This sets off the artwork and makes the book mark look more finished. (You might also add a person’s name on the back to make sure each family member has his or her own.) The final step is to laminate them. Of course you can use laminating sheets, but I usually use book tape because it is heavy duty and wide enough to cover the whole book mark in one piece (and I always have some in my stash). Once this is done, you could punch a hole in the top center and add a piece of ribbon, if you like.

Generally I don’t do this because the addition of free floating ribbon just means an item will become a cat toy at my house. As a matter of fact, here’s a snapshot of my almost constant companion, Wulfgar, who was named after a character in a book! He loves to play with dangling pieces of ribbon!

DSCN2328

To help you get started with this project, I doctored last weeks free download a little, adding lines every 1.5 inches to make it extra easy to turn the page into some bright floral book marks. Happy coloring (and reading, too)!

spring flowers book marks

Colorful Party Favors and a Free Download

Standard

Spring seems to be a time for bright colors and celebrations – Easter, Mother’s Day, Graduation, along with the perennial baby showers, birthdays, and bridal showers. These special days often entail parties with friends and family, so today I’m going to show you how to make an easy party favor/decoration for your next get-together.

As always, I’ll start with a finished coloring book page. This one came from Art Nouveau Animal Designs from Creative Haven. If you are making several of these party favors, using multiple pages from the same coloring book will help carry through your theme without being repetitive. (Get family members to help color the pages if there are quite a few!) If you’re pressed for time, color one or two, and make copies.

DSCN2309

To make sure you get as much color and design as possible, start by trimming away the white borders.

DSCN2310

Next, shape your paper into a cone. I used double-sided tape to secure the edges, but glue would work well, too, though you’ll have to clip the edges in place until the glue dries (or use hot glue for instant gratification).

DSCN2311

Next, I used some sparkly tape to fashion a hanger. You could use ribbon, rickrack, washi tape, or even pieces of left over paper to create a hanging loop. I just stuck two pieces of tape back-to-back to make it pretty from both sides. Then I used a tape remnant to adhere the loop inside the back tip of the cone.

Next, I used a scrap of construction paper to make an edge that covered up the attachment and the inside of the coloring page where the marker showed through. This could be gussied up by using paper doilies or fancy punches for a lacy edge (perfect for Mother’s Day or a bridal shower). As you can see, I just rolled up the scrap and put it inside the cone. When I released it, the scrap adjusted itself to the space, and I used double-sided tape to hold it in place.

Once the cone itself is finished, it’s time to embellish! (You didn’t really think I’d just leave it plain, did you?) I started with an old button and some scraps of ribbon and rickrack. I pulled a piece of pretty gold rickrack through the button holes, made loops for a bow with the remaining pieces and then tied it all together. Tying the bow through the button made it very easy to attach it to the cone with hot glue.

While I had the glue gun out, I couldn’t resist adding some colored jewels from my stash. Use whatever you have on hand and whatever fits your theme. After I finished, it occurred to me that I could have outlined some of the elements on the coloring page with glitter before I started. I think that would really pretty if you were doing something bird themed or in pastels and lace trims.

DSCN2323

Here’s the final product. It is ready to fill with some goodies from the store or from your kitchen. I think wrapping some candy in a piece of tulle and tying it with a pretty ribbon would finish this off nicely.

DSCN2322

Since spring is all about flowers, I’m attaching a downloadable fun flower design coloring page to use at your next party. Happy coloring!

spring flowers freebie


Decisions, Decisions

Standard

If I have to stare at the computer screen for another hour this week, I might scream. (Oh wait, here I am in front of a computer screen – sigh.) Our digital world has presented many pros and cons lately. As I move through ordering materials for our new venture I find myself making decisions about canopies, display pieces, retail shopping bags, logo stickers, packaging, and at least a dozen other items that have currently slipped my mind. (It’s a good thing I keep a notebook!) On one hand, I am grateful to have so many online stores providing so many choices that I can (after so many hours of searching) get exactly what I want at a price I can afford. On the other hand, the dizzying array of choices seem to make the decisions harder than they have to be.

I’ve discovered I do that frequently – make decisions harder than they have to be. My mind has a difficult time settling on something (anything) until I’ve scoped out all (and I do mean ALL) of my options. While this usually means I’m happy with my final choice, it also means that I spend a lot of time agonizing over details that may seem inconsequential to others. For example, I spent several hours on four separate days looking at retail merchandise bags to use following a sale. What’s so hard about choosing a bag, you ask? Aside from the fact that there are about 300 kinds that I never realized existed and that online sellers have widely varying prices, minimum quantities, and shipping costs, I’m concerned about getting just the right feel for my customers. I want to be sure to choose an environmentally friendly bag. I want to be sure to give my customers an “artsy” feel at the end of the purchase. I want my customers to feel they have acquired a gift, whether it is for themselves or someone else. I want to be sure it is a reflection of our business idea that life should be seriously colorful. Ultimately, I think I found a bag that ticked off all of those boxes, but it was not easy, and (I can assure you) I lost sleep at night contemplating the pros and cons of paper versus plastic.

While this may seem like overkill, I’m discovering that the devil’s in the details. My parents owned businesses for many years, and I did a great deal of research and reading before starting this (very) small business. I think I’m going in with my eyes open, but I’m still surprised by the number of seemingly easy decisions that have a large impact on a daily basis. I never imagined buying things like envelopes and zip ties could hold so much significance that I would comparison shop at least 10 sellers before ordering. Nor did I imagine how excited I would be when the UPS truck stops in front of my house. Tomorrow Lochinvar and I are going to put the whole display together for the first time. (I’ll probably lie awake tonight imagining how wonderful it will be!) As each decision is actually made and each order is fulfilled, we feel ourselves moving closer to the moment of truth and the anticipation is tangible. So, while the decisions are frustrating and tiresome, they’re also paving the way for us to really get started on this adventure. And we’ve learned from experience that no matter what happens, at least it will be interesting.